Table of Contents
You can have a well-structured website with plenty of useful information. However, your customer and website visitors will still inevitably have questions or need help using your site.
Chatbots are a powerful automation tool WordPress users can implement to provide better customer service through their websites or social channels. As an alternative to live chats, chatbots let you quickly answer common questions as well as add a bit of personality to your site.
In this article, we’ll explain what chatbots are and why they’re beneficial for your website. Then, we’ll walk you through the four steps of creating a chatbot for your WordPress site. Let’s get started!
Are you ready to start your own online business? Get started with Easy Affiliate!
The Benefits of Creating a Chatbot for Your WordPress Site
A chatbot is essentially a robot you can use on your website to carry out text conversations with visitors. Apple's Siri and Amazon's Alexa are examples of sophisticated chatbots.
There are different kinds of chatbots. A popular type is social media bots. For example, businesses can use Facebook Messenger as a chatbot on their business profile pages.
These automated chat systems take the place of a live customer service representative. The chat interface can help deliver better user experience, drive calls to action (CTA), and collect data from site visitors.
Adding a chatbot to your website can save you time by answering repetitive questions for you. It can also help infuse your site with a bit of personality.
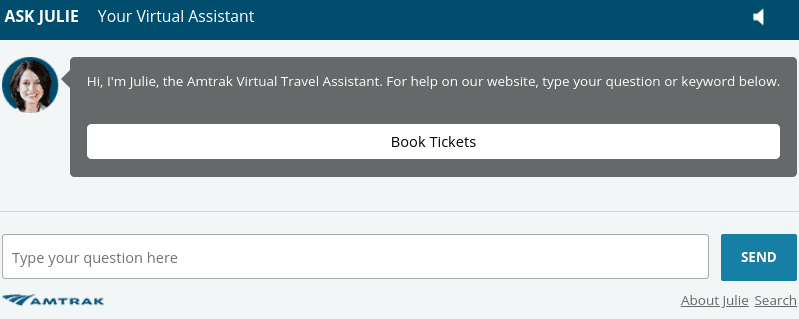
Chatbots can be particularly beneficial for affiliate marketing programs. In addition to being a useful lead generation tool, they can also display affiliate links.
While the artificial intelligence technologies behind chatbots are impressively capable of mimicking human speech and conversation, there's no actual human on the other end. Chatbots are effective for answerings FAQs, but they can't handle all tasks. You'll still need a support team to handle some visitor requests.
How to Create a Chatbot for WordPress (In 4 Steps)
Adding a chatbot to your WordPress site doesn't require a lot of technical knowledge. In fact, you can do it by following the four steps below.
Step 1: Sign Up for a Chatbot Tool Such as Botsify
There are many plugins and tools you can use to create a chatbot. We recommend Botsify because it's easy to use and it doesn't require a plugin (though there is one available if needed):

This chatbot tool integrates well with WordPress and includes a lot of customization options. Thanks to its drag-and-drop feature, there's no coding required.
You can choose from two different pricing plans. However, you may consider signing up for a 14-day free trial so you can test the tool, see how it works, and whether you like it before committing. Once you sign up for your account, you'll be emailed instructions on getting started.
Most chatbot tools are similar. So, if you decide to go with an alternative, such as WP Chatbot, the following instructions will be similar.
Step 2: Choose a Template for Your Chatbot
After you log into your account, you'll be prompted to fill out a series of questions. The first is to choose a template for the chatbot. You can choose an existing template or create your own (which is what you'll want to do if you're creating one for your site).
When it asks what you plan to use Botsify for, click on Generate Leads for your Business from Website:
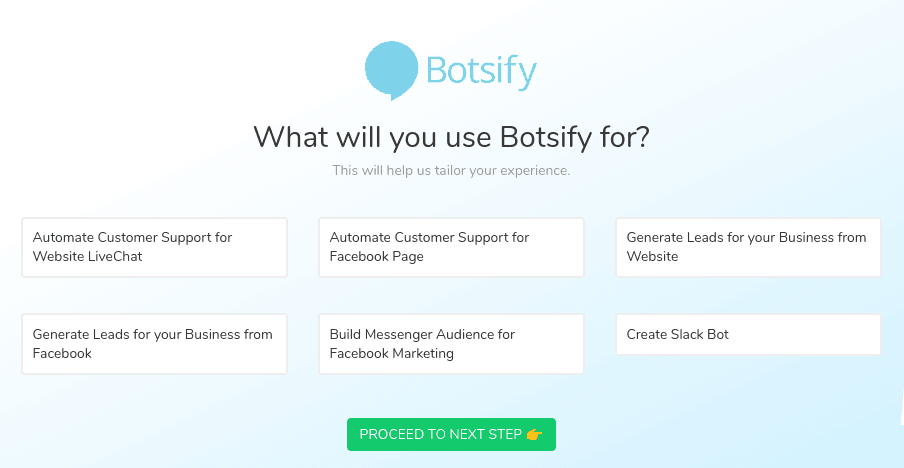
After you select Proceed to Next Step, you'll be asked to answer additional questions about what information you want your chatbot to collect. Then, you can name your bot, customize the greeting message, and choose an avatar:
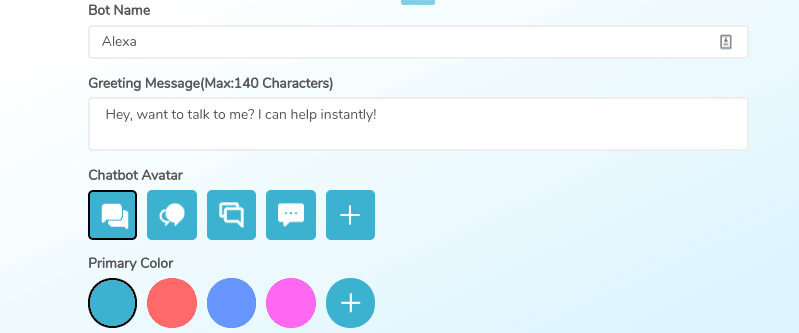
A preview of your chatbot will appear in the right-hand corner. Once you're satisfied, you can click on Save & Continue. Remember, you can always come back to change these settings later.
Step 3: Customize Your Chatbot's Messages
To change what the messages will say, you can go to the Botsify dashboard. On the left-hand side, under the Chatbot AI drop-down menu, click on Basic Messages:

There's a lot of information and many options in this section. To keep it simple, you may consider starting with the Greeting Message and Default Message sections. Under the Default Message section, you'll find generic responses you can use. Under Common User Questions, you can input your answers for some of the most frequently asked questions for chatbots.
After you spend some time familiarizing yourself with the messaging options, you can move on to “teaching” your chatbot what to say. The options for doing this are located under Chatbot AI > Story:
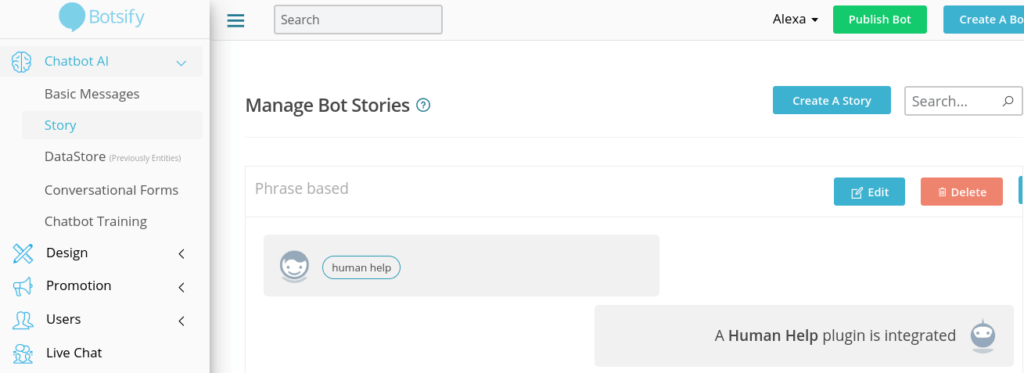
This is one of the more in-depth steps of the process. However, Botsify offers a comprehensive guide on how to train your chatbot that you can use as a reference.
Step 4: Add the Chatbot Code to Your WordPress Footer File
When you're done customizing the messaging, you're ready to add the chatbot to your WordPress site! You can do this by embedding a snippet of code to the footer.php file of your WordPress site.
There are a couple of ways to go about this. On the left-hand side of the dashboard, click on Publish Bot > Connect to Website:
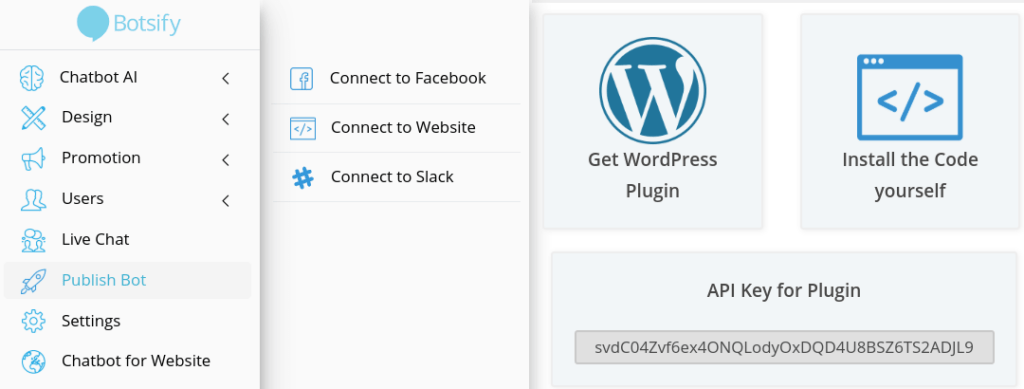
If you want to manually add the code to your site, you can do so by clicking on Install the Code yourself. You can then copy the embed code that appears to paste into the footer.php file of your site.
However, if this is something you're uncomfortable or unfamiliar with doing yourself, you may consider using the Botsify Chatbot Widget plugin instead:
After you install and activate the plugin on your WordPress dashboard, click on Botsify. It will bring you to a page where you can simply paste the API Key provided under the Publish Bot options:
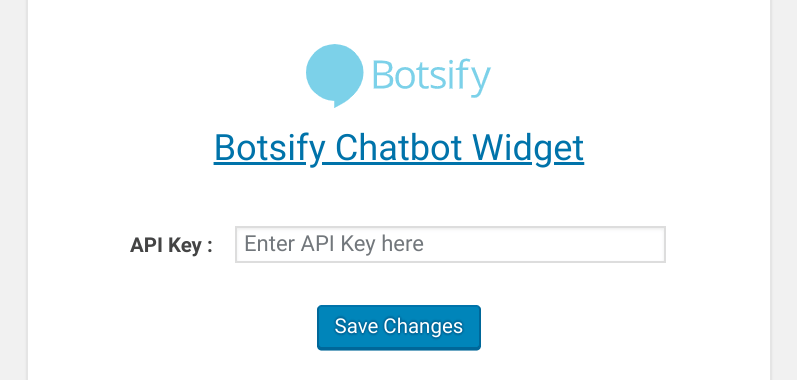
Once you paste the API Key, click on Save Changes. That's it! Now, if you preview your website, you'll see the chatbot appear in the lower right-hand corner.
Conclusion
You want your website to be a valuable resource for your business. However, you’re not always available to answer visitor questions or inquiries. Chatbots are virtual assistants that serve as an effective alternative to live chats.
As we discussed in this article, there are four steps to creating a chatbot for WordPress:
- Sign up for a Botsify account (or similar chatbot tool).
- Choose a template for your chatbot.
- Customize your chatbot’s messages and stories.
- Add the chatbot code to your WordPress site.
Help your affiliate program reach new heights with Easy Affiliate. Get started today!
Do you have any questions about creating a chatbot for WordPress? Let us know in the comments section below!
If you liked this post, be sure to follow us on Twitter, Facebook, and LinkedIn! And don't forget to subscribe in the box below.


Leave a Reply